This video demonstrates how to edit an interview. Its purpose is to illustrate how to approach the interview editing process, and not how to edit in iMovie. The subject of our interview is Lee Foster, author of “Travels in an American Imagination, The Spiritual Geography of Our Time”. The interview was shot on a iPhone 4S at a Bay Area Independent Publishers Association (BAIPA) workshop.
Begin by importing and reviewing your video footage. Your goal in the review process is to locate sound bites from your footage that you can combine together to create a story about your subject. It’s sort of like piecing together a jigsaw puzzle, where your looking for sound bites that will fit together to make a logical story. As you proceed, you take the various sound bites and add them to the iMovie timeline. The idea here is to construct the audio narration footage, without being concerned about the continuity of the video images. Once you’ve established a viable narration track you can move on to thinking about adding images to enhance the audio.
With the audio narration track established, the next step is to import images that will support the subject of the narration. These images can be other video clips, called “B-Roll”, photos, diagrams, animations, or even website screen shots. These images are located on the timeline, above the narration video track. We can still hear the audio, but the idea here is to “SHOW” rather than tell about what the speaker is talking about. Believe me, no one is interested in watching a talking head go on, and on, and on.
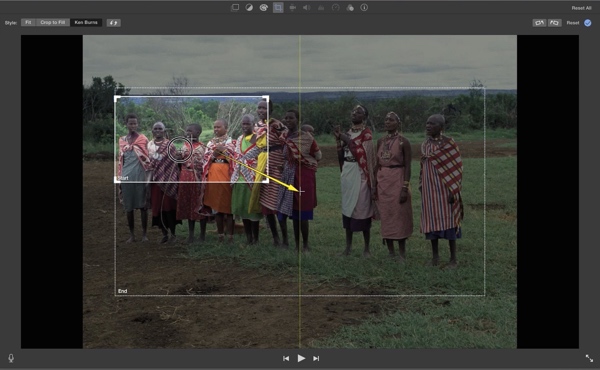
This video incorporates photographs to illustrate what Lee Foster is talking about. To make the photos more visually engaging we’ve used the “Ken Burns Effect”. The Ken Burns Effect allows us to create the illusion that the camera is moving across the images. With it we can pan, tilt, zoom-in and out of these images creating more visual interest.
The last step in the process would be to add title, lower 3rds, and the credits for all participants and media used.


 Previous post
 Next post


