As with playing golf, painting a picture, flying a plane, running a business, or engaging in any other worthwhile activity, getting good at making movies can be a lifelong activity. Even the greatest filmmakers learn every time they make a movie.
Nevertheless, by implementing a few simple strategies (described below), you can use your mobile device to make movies that will entertain and inform your friends, colleagues, and—via the Internet—people you’ll never meet.
Mobile moviemaking technology will make it possible to capture important events in your life, train your staff, create works of art, and express your ideas. While video won’t replace writing and other media, it does gives you a powerful option.
Experienced moviemakers talk about three phases of moviemaking:
- preproduction (planning a project)
- production (shooting it)
- post production (editing, adding sounds, titles, and visual effects). In Hollywood, each phase can take a lot of time.
Keeping in mind those three keys steps will help you produce video at a surprisingly high level.
To make the following tips less abstract, we’ve provided entertaining video examples. Most run just a couple of minutes. The verbal advice given here will be greatly enhanced if you view the videos. Doing so may push you beyond the 15 minutes promised in the title, but the extra time will be well spent.
1. Plan your movie.
Don’t shoot for shooting’s sake. No one wants to look at random video clips—unless it happens to be a genuine UFO landing in your back yard. Rather than just shoot when something catches your eye, identify the category (the genre) of the movie your making. For example, instead of collecting unconnected highlights at a party, imagine that you’re making a documentary. On a trip, tell yourself you’re shooting a travelogue. The best way to master any genre is to look at examples. At www.mobilemoviemaking.com you’ll find outstanding videos in many genres including music video, comedy, thriller, silent movie, news, and training video.
Example of a travelogue: https://mobilemoviemaking.com/lisbon-live/
https://mobilemoviemaking.com/lisbon-live/
2. Write a script.
This doesn’t have to be a complex document like a Hollywood screenplay. Simply listing a few shots that you need to tell your story can help. While a script is essential for a story movie, it also valuable in other forms, for example, writing the questions for an interview or identify key scenes in a documentary or travelogue.
Example: “Summer of the Flying Saucer” trailer
3. Keep it short.
All things equal, the longer your video the lower the quality. Some of the best moviemaking is in the form of 30-second commercials, or 90 second blogs. If you shoot an hour video of your trip to the South Pole, most people won’t look at it. But a 5-minute travelogue, which features the highlights, will likely hold an audience. Yes, you’ll need to leave out a lot of stuff…just like all the great filmmakers. (See editing below)
Example: “Toilet Roll Changing”
Example: “Prague in a Minute”
4. Frame wide.
Because our eyes are set side-by-side, we’re using to seeing the world horizontally, not vertically. Movies have reflected this bias for a long time. While there is no law against shooting vertically, your movie will seem more professional if you frame wide.
Example: 10 second tip: tilt tip
5. Break the action into short shots.
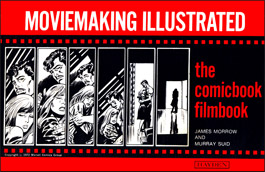
Suppose you’re making an instructional video of how to bake bread. You could shoot the whole activity all at once. But to add interest and clarity, break the action into small pieces—separate shots. While a shot can be as short as a second or runfor many minutes, on average shots average about 3 to 10 seconds. (Note: You can shoot for longer and then in the editing break a long shot into shorter shots.) If you want to train yourself in the art of thinking in shots, study comic strips and comic books. Each panel is equivalent to a shot.
Example: “The Fixer”
6. Be steady.
Nothing screams “amateur” louder than jiggly video. The latest mobile devices have stabilization software that electronically steadies the shots. You can also buy inexpensive apps for stabilization. But often you’ll do better by placing your camera on a tripod. If hand-held shooting is required, try attaching your mobile to a steadycam device.
Example: Hyperlapse experiment
7. Let your subject do the moving.
The “move” in movies generally refers to a moving subject: a person running, two people fighting, clouds floating by, cars racing. The best time to move the camera is to follow a moving subject. Of course, there are exceptions. You might pan across a spectacular landscape or pan up a tall skyscraper. You might want to follow behind a moving subject. (In this case, it’s best to mount your camera on a wheeled conveyance to avoid an up-and-down bouncy image.) Just remember: audiences will respond more positively if the camera doesn’t move much.
8. Vary the perspective.
One of the major differences between the theater and movies is that theatergoers have a fixed visual relationship to the performers. Moviegoers, on the other hand, are treated to a constantly shifting perspective—sometimes far back, sometimes close in, sometimes looking down, sometimes looking up, and occasionally taking a totally surprising vantage point—for example, shooting through a telescope. Probably the signature feature of movies is the close-up which allows the audience to see details: the villain’s snarling mouth, the child’s wide eyes, the magician’s hands, the gunslinger’s trigger finger. Learning to get the most effective shot at a given moment takes practice. But if you simply remind yourself to vary the distance and the angle—and especially to come in close—your videos will gain tremendous visual power.
Example: “Rain”
Example: “Nothing to Prove”
9. Play with the light.
Modern mobile devices do a good job of using available light to illuminate the subject. But if you rely on the camera to set the lighting, you’ll miss opportunities to create strong visuals. Lighting is a complex art, but for starters, try the following simple options:
* Arrange for your subject to be lit from the side. Often natural light coming in a window will do the job.
* Backlight a character to create a silhouette effect.
* Use on-screen lights such as candles and lanterns.
Example: “Julie Drinks”
Example: “MKE lagoon” (golden hour)
10. Avoid noise.
We think of movies in terms of visuals. But ever since sound was wedded to movies in 1927, what we hear plays a big role in how we feel about what’s on screen. Getting good sound is challenging, but here are a few simple things you can do that will elevate your work above the amateur level:
* If you’re recording someone talking—say for a documentary, a commercial, or an interview—do it in a quiet place. Background noise can ruin a video.
* When recording someone, either shoot close up or—better—use an external clip-on microphone (costs about $50).
* If you’re shooting in a place where unwanted noise can’t be avoided, plan to delete the sound in the editing stage and add music or narration (voice over).
* If you’re making a story movie, consider using voice over rather than recording dialogue. You’ll generally get much higher equality, especially if your actors are untrained. Some of the world’s greatest movies have used voice over.
Example: “Requiem”
11. Look for candid moments.
In fiction movies, actors pretend that there is no camera. This gives the audience the sense that they’re seeing reality. You can use the same approach even with nonfiction movies such as documentaries and travelogues. Film subjects when they are engaged in activities.
Example: “The Birdman”
12. Experiment with visual effects.
Thanks to the imagination of many programmers, you can create stunning visual effects such as slow motion, reverse motion, and time lapse. Overusing techniques for transforming reality may lead to a gimmicky video, but used artfully, they have the potential to enrich your work.
Example: “Time Lapse of the Golden Gate Bridge”
Example: “Splitscreen: A Love Story”
- Edit your footage.
Someone once asked Hemingway the secret to his writing success. He answered, “Twelve drafts.” He took the original material and reworked it—cutting, adding, rearranging—until it seemed to flow naturally. The same process holds with video. To produce a video that is polished, in almost every case you’ll want to edit the raw footage. Luckily, thanks to modern software, editing is something anyone can do. Essentially, you will:
* trim shots (omitting parts that don’t work)
* arrange shots into compelling sequences
* add new material as required
* add sound (music, voice over)
* add titles and other graphics
If you’ve never edited, you can find are easy-to-understand—and really interesting—Internet tutorials, such as those offered by Ripple training for iMovie.
Example: “Brendan O Se- iPhoneographer”
14. Share your work.
In the ancient days of movie film, exhibiting your work was a big chore. Now, thanks to video hosting sites such as “YouTube” and “Vimeo,” you can upload your video and exhibit it with the world. Or you can upload it, password protect it, and show it only to those whom you choose. Uploading is easy—pretty much drag and drop. At the major video hosting sites, there are just a few steps once you’ve put your video on your desktop. There are plenty of quick tutorials on this subject, for example, https://www.youtube.com/watch?v=Hlxqk0iHp5w
Another option is to share with the audience at MobileMovieMaking.


 Previous post
 Next post


